Before using aerial drones for your photography projects, it's important to understand some of the basics. First, determine your objectives before taking off. Which time of the day is best to shoot photos? How will the sun position itself? What natural lighting do you wish to capture You don't just need to snap a few photos with your drone; you can also create time-lapses or use waypoints for planning your shots.
Tripod mode
There are several benefits of shooting video in tripod mode, and the main one is enhanced control. It will fly slower and have a lower sensitivity, which makes it a great mode for showing properties from low angles. Tripod mode is also useful for indoor filming. It also allows you to create smoother footage. This article will cover the main reasons you should use tripod mode to take aerial drone photos. We hope this article gave you some ideas.
Avoid high altitude
It is difficult to get a great shot. Many newbies feel intimidated by the prospect of flying at high altitudes. These are the things to remember when you take your aerial drone photos. It is important to remember that the camera cannot be stabilized by the ground. You can compensate by using these tips to capture the best images.
Using waypoints
Using waypoints for aerial drone photography will allow you to replicate previous shots. Set up waypoints for timelapse photos. The drone will fly to the same spot automatically and take photos. Waypoints can be created for audiovisual recordings. Manual flights may not always be possible due to weather conditions or unforeseen circumstances such as wind or rain. Waypoints can be used to avoid costly pilots in such situations and result in beautiful photography.
Time-lapses
Time-lapses using aerial drone photos require you to choose the right location and ensure that the conditions are perfect. The drone should remain in a steady area, not moving. The image will appear shaky if it moves. You want to plan your photoshoot well in advance. You should be aware of objects that might cause interference with flight.
It is a good idea to plan ahead
Photography from an aerial drone requires planning and research. You must be aware of any obstacles and plan your flight accordingly. It also helps to know the camera settings beforehand, so you can frame shots as you arrive. Here are some tips to maximize your aerial photography experience. Preparing ahead can help you save time and frustrate. Here are some tips to help you capture aerial drone photos. Follow these tips and you'll have no problem shooting stunning images.
FAQ
Do I Need A Tripod?
This is one of those common questions. The truth is that a tripod isn't always necessary, but it can come in handy.
It helps you keep your camera steady while taking pictures at slow shutter speeds. Tripods can be a huge help when you are shooting landscapes or stationary subjects.
A tripod can also cause blurriness when you are photographing people or sports. So, how do you know which situations require a tripod?
A tripod can be useful in any situation where you need to capture fast action or stationary subjects. Examples include:
-
Sports
-
People
-
Landscapes
-
Close-ups
-
Macro shots
You can use this test to determine whether you need a tripod. You can hold your camera still while you look through the lens. If you see blurred lines or movement, then you definitely need a tripod.
A tripod won't make any difference if there is no blurring.
Here are some tips for those who do decide to buy a tripod.
-
Make sure your tripod has smooth legs. This prevents unwanted vibrations from shaking your camera.
-
Make sure you choose a sturdy tripod. Some tripods can be made out of plastic but they are not very durable. Opt for a sturdy metal tripod.
-
A remote release is a great option. You can control your camera remotely with this remote release. The button can be pressed to activate the shutter.
-
Make sure to look for a tripod that rotates 360 degrees. This allows you to place your camera horizontally and vertically.
-
You should keep in mind that tripods don't come cheap. Expect to pay $100-200. You will still get a lot out of your money.
-
Accessories such as filters and memory cards should be considered.
-
Before you buy online, make sure to check your local shops. Many retailers offer free shipping.
-
To find out what customers think about a product, read reviews.
-
Ask friends and family members who own similar products.
-
Forums and message boards are a great place to find out about customer experiences.
-
Find user reviews online.
-
Use websites like Amazon.com to compare prices and read customer feedback.
-
Take a look at these photo galleries to see what other photographers do with tripods.
Cameras available for purchase
There are many places online that you can purchase cameras. B&H Photo Video, however, is recommended as a trustworthy retailer. They have knowledgeable staff that can help answer any questions you may have.
B&H also ships quickly and securely, making it easy to get your order delivered to your door.
You can learn more by watching this video about shopping for cameras.
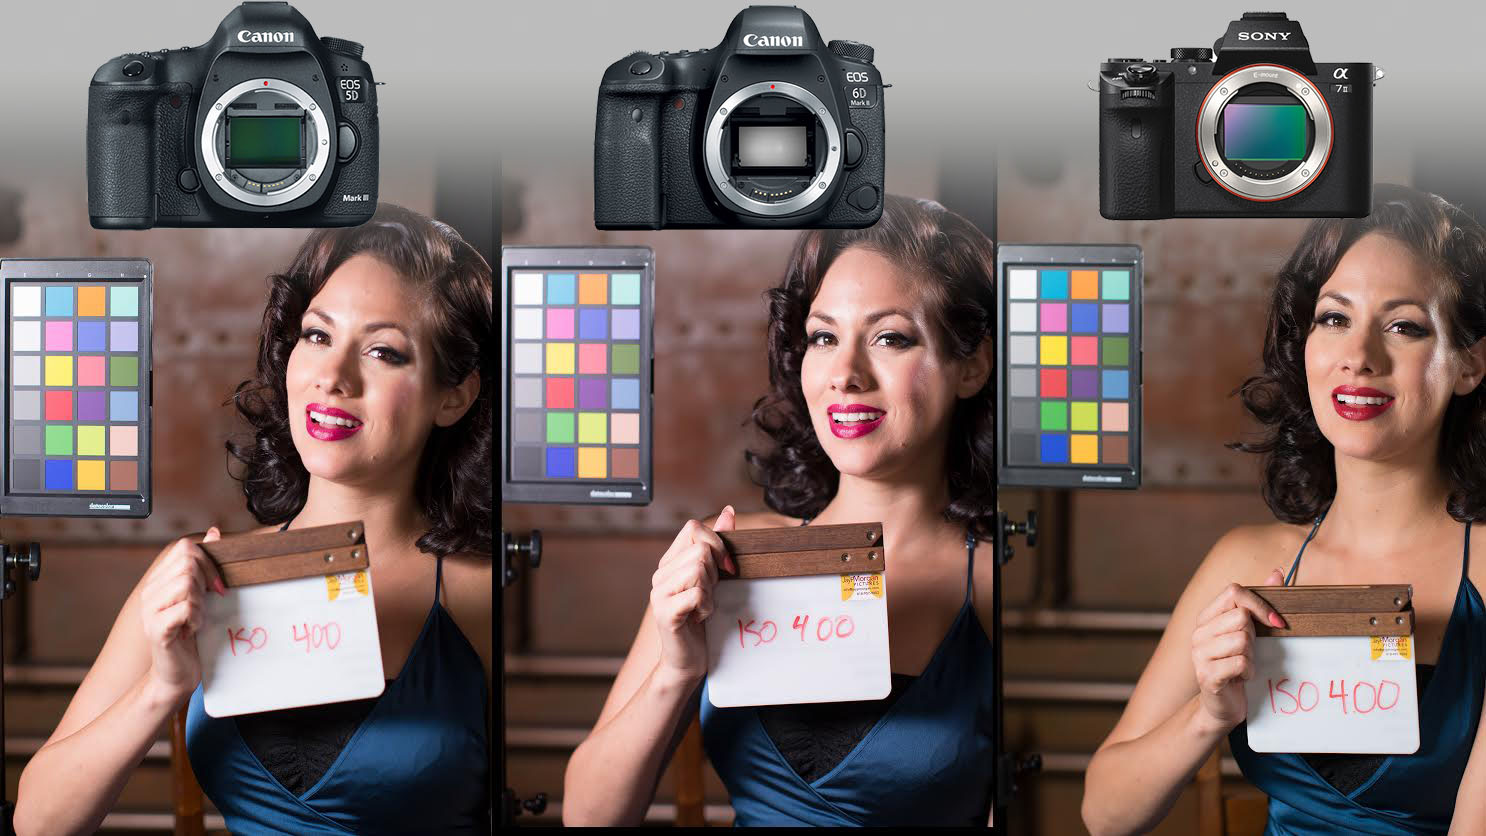
What Camera Should I Get
All depends on the type of photographer that you want to be. For beginners, a simple point-and-shoot is the best camera.
However, once you've mastered the basics, you'll likely want something more advanced. Personal preference is the only way to decide.
Here are some things to consider before purchasing a camera.
-
Features: Which features are most important? What features do you need? How many megapixels is your camera capable of? Is there a viewfinder?
-
Price: How much do you want to spend? Are you going to buy a new camera every year?
-
Brand: Is it possible to be happy with your brand choice? You shouldn't settle for less.
-
Functionality: Can your camera operate in low light conditions well? Do you have the ability to take high-resolution pictures?
-
Image Quality: How clear are your images and how sharp are they?
-
Battery Life: How long will your camera last between charges?
-
Accessories: Are you able to attach additional lenses or flashes? ?
Statistics
- While I cannot prove that all of those spots were not sensor dust, the photo was taken during a heavy snowstorm…so I guess that 99.8% of the spots are snowflakes. (bhphotovideo.com)
- That's the easiest way to get blurry photos 100% of the time. (photographylife.com)
- The second easiest way to get blurry photos 100% of the time is to use a cheap filter on the front of your lens. (photographylife.com)
- In this case, 100% of readers who voted found the article helpful, earning it our reader-approved status. (wikihow.com)
External Links
How To
How to Take Portrait Photos
Portraits are important, because they reveal who you truly are. Portraits also tell your story. While you may have one favorite photo of yourself as a child, you now want to take something different. It's easy not to remember how much fun photographing can be. Here are some tips for getting started.
-
Be sure to have sufficient light. It is best to take portraits in the morning, or late afternoon. Use flash only when there is not direct sunlight. It will wash out details. Also, avoid shooting at midday. You will have too many shadows.
-
Use a tripod. If you are holding the camera still, there will be no movement. The camera will not freeze the action. If you plan to use flash, make sure that your shot is set up without one. You can then turn the flash off and try again.
-
Make close-ups. Closeups allow you to show detail. They can also look fake if they aren't done well. Pay close attention and observe the noses, eyes, and mouths. Do you see anything strange? Are glasses worn by someone? Are there freckles around her nose? These things add depth to a person's appearance.
-
Smiles are not something you can force. Smiles can be difficult. Many people smile naturally when happy. However, others may not. If you try to force them, it just looks unnatural. What makes you laugh? You might find something silly, like a cat leaping through a hoops. Maybe you enjoy watching paint dry. Whatever it may be, don't stop thinking about it until your heart starts to laugh.
-
Creativity is key. People tend to think that they are boring. But being ordinary isn't bad. You can find ways to be different from the norm. You could ask your friend to put his hands behind his back and pose with them. You might also suggest that he wears a funny hat.
-
Keep practicing. You will improve your ability to capture moments if you keep practicing every day. As you improve, you will be able to see more interesting events around you.
-
Have fun. It should be fun to take photos. You'll be more inclined to return to the same process if you enjoy it. Additionally, you will probably end up with some very cool photos.
-
You should share your work. Once you are able to take high-quality pictures, share them. Tell them why the photo was taken. Show them the place you were. Tell them about your adventures.
-
Be patient. Sometimes it just doesn't work. It happens to all of us. Don't worry. Keep moving on to another image.