Three-point lighting is a key method in visual media, such as film, theater, and still photography. It evenly distributes light across the scene. It is also used in 3D computer graphics. Various types of three-point lighting are used for different purposes. Here are some of our most used examples.
Three-point lighting
Three-point lighting has become a very popular lighting method and can be used in many different situations. Three different lighting sources are used to create a mood. These lights can be colored or neutral and can either act as a key light, or fill light. The three points allow you to paint your subject with light. This versatile technique is great for indoor studios, but can also work in ambient lighting.
Depending on the amount of lighting available, a three point lighting setup may require two, three, and four lights. A key light is used to illuminate the subject. A fill light provides backlight. The key light should be 25% to 50% brighter than the fill light.
Kicker light
A Kicker Light is an additional light source used in photography to create more contrast between the model and the background. This is often used for corporate headshots. The light can add dimension to a portrait, and give it a polished look. The light source should be behind the model, or one side of the frame.
The Kicker lights are usually placed right in front of the subject. You can adjust the intensity of these lights using feathering. This allows you to control the light spread and is great for Kickers. Some photographers prefer placing their Kicker on the same side of the subject as their Key Light. The Kicker should provide a stronger light than the Key Light.
The Kicker light can add interest to the composition as well as help to define facial features and create a 3-dimensional look. A Kicker light isn't necessary for all portraits.
Fill light
For best results when using three point lighting, balance the brightness of each light. This type of lighting technique can create dynamic shadows on the subject's face, so you will want to choose the right amount of brightness for each light. You can adjust the brightness by using a diffuser, bounceboard, or moving the light source.
Three-point lighting uses three sources of light. These are the key, fill, and back lights. The key light is the primary source of light and will direct the most light onto the subject. The fill light is the second source of light and will soften any shadows cast by the key lighting. A third light, known as the back light, will be placed behind the subject.
The three-point lighting technique makes the subject stand out and look three-dimensional. It makes it possible to control the depth and tone of shadows. To create soft shadows on the subject's faces, you can adjust either the key light of the fill light. The fill light is also extremely important because it can change the mood of your shot.
FAQ
Do I Need A Tripod?
This is one of those questions that everyone asks. While a tripod may not be necessary all the time, it can prove to be extremely useful.
This allows you to keep your camera steady even when taking slow shutter speeds. If you're shooting landscapes or other stationary subjects, then a tripod can make a big difference.
On the other hand, if you're photographing moving subjects such as sports or people, using a tripod can cause blurriness. How do you decide which situations are best served by a tripod.
A tripod is useful for any situation where you want to photograph fast action or stationary subjects. Examples include:
-
Sports
-
People
-
Landscapes
-
Close-ups
-
Macro shots
If you're unsure whether you need a tripod, try this test. Look through the viewfinder with your camera steady. If blurred lines appear or you feel movement, you will definitely need a tripod.
If you don't see any blurring, you probably won't notice any improvement by adding a tripod.
These are just a few tips to help you decide whether or not to purchase a tripod.
-
You should ensure that your tripod has smooth legs. This helps to prevent vibrations from shaking the camera.
-
You should choose a sturdy tripod. Some tripods can be made out of plastic but they are not very durable. Consider a tripod made of metal.
-
You might consider purchasing a remote control. You can control your camera remotely with this remote release. It can automatically fire the shutter when you press the button.
-
You should look for a tripod with 360 degree rotation. This makes it much easier to position your cameras horizontally or vertically.
-
Tripods are expensive. Expect to pay around $100-200. However, you'll get lots of value for your dollar.
-
Don't forget accessories such as memory cards or filters.
-
Before ordering online, you should check in your local shops. Many retailers offer free shipping.
-
You can read customer reviews to see what people think of a product.
-
Ask family and friends who have similar products.
-
Visit forums and message boards to learn about customer experiences.
-
Search online for user reviews.
-
Use websites like Amazon.com to compare prices and read customer feedback.
-
Take a look at these photo galleries to see what other photographers do with tripods.
Is photography a talent or a skill?
Photography is an art form, not a talent. It requires training, experience, and practice. The art of photography requires years of practice and dedication to mastery.
You need to plan how you will make money in photography.
To do this, you need to understand what kind of clients you want to attract and find ways to reach them.
You must understand their motivations and who they are. You must learn to communicate clearly and persuasively to persuade them to buy your services.
This means you must be prepared to meet potential clients.
When you are ready to approach potential customers, you will need to create a portfolio of your work. This can be done electronically using software programs or printed on paper.
Once you have created your portfolio, you need to find opportunities to display it. This could mean approaching businesses directly or advertising online.
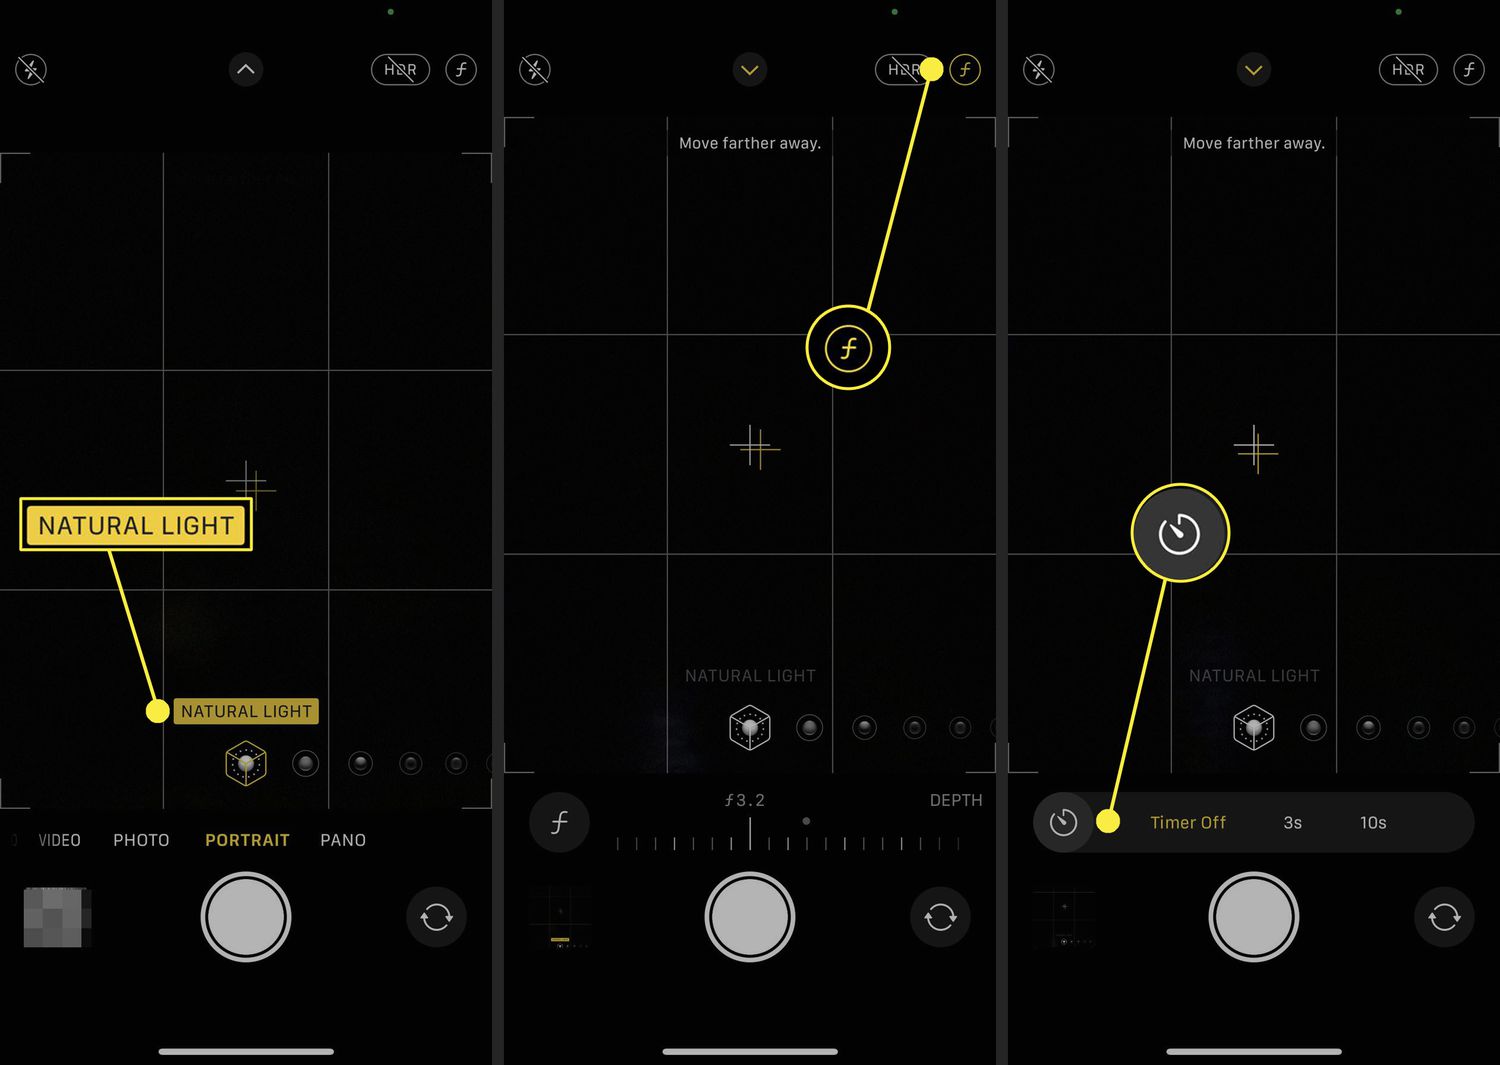
How can I improve my photography skills on my phone?
Amazing photos are possible with minimal equipment. Amazing photos can be taken with your smartphone.
Just need to learn the basics of how to use it all.
There are many apps available for both Android and iOS devices that make it easy to edit and share your pictures.
These five tips will help you take better photos.
-
Set Up Your Camera App. Your camera app should already be installed on your device. If not, download it from Google Play or Apple's App Store.
-
Use Effects & Filters. You can change the look of your photo with filters and effects without even touching it.
-
Adjust Exposure. You can control the brightness by changing your exposure.
-
Use the Right Lighting Shooting in bright light makes it easier to see details in your subject. If you shoot in low light, it is possible to capture shadows or highlights in your photo.
-
Photograph People. It is a great way to share your love with others by taking pictures of them.
To learn more about how to take better photos, check out our article: 5 Tips To Improve Your Photography Skills On A Smartphone.
Statistics
- In this case, 100% of readers who voted found the article helpful, earning it our reader-approved status. (wikihow.com)
- This article received 13 testimonials, and 100% of readers who voted found it helpful, earning it our reader-approved status. (wikihow.com)
- There are people out there who will pick at flaws they can only see in 100% crops of your photos. (wikihow.com)
- By March 2014, about 3 million were purchased monthly, about 30 percent of the peak sales total. (en.wikipedia.org)
External Links
How To
What are the essential skills required to be a professional photographer?
Basic skills for any job in photography include artistic ability, technical knowledge, and business acumen.
Technical knowledge includes understanding exposure, camera functions, lens type, film speeds, and developing techniques.
Understanding composition, lighting, and poses is essential to artistic ability. You also need to know how to use Photoshop and other editing software.
Business acumen covers budgeting, scheduling, time management, and dealing with clients.
You should be interested in photography as a hobby from an early age if you wish to be a professional photographer.
Take classes at school, college, or online to learn more about photography.
Many books are available to help you learn all aspects of photography.
Not only is it important to study photography, but it is also important to develop your style.
This will allow your to stand out in this field.
Photography has evolved over the years. In the past people used cameras like the Kodak Instamatic or Polaroid instant camera.
Digital cameras have become more popular today than ever. Nowadays, most photographers use smartphones to capture photos.
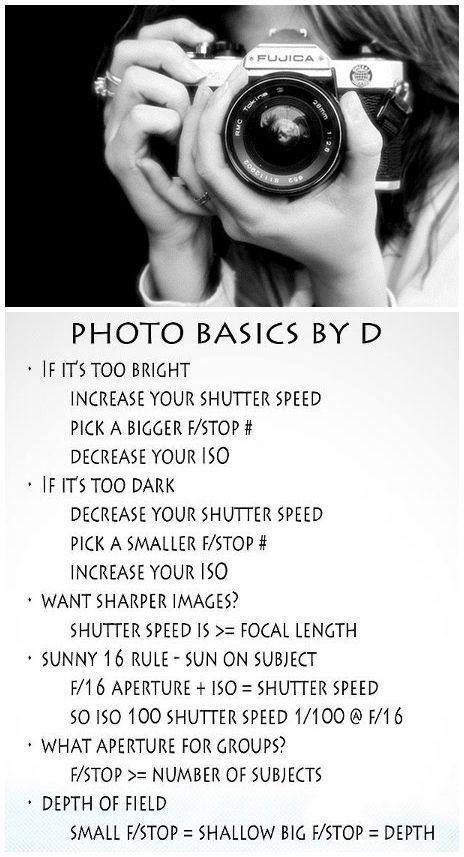
You can buy a smartphone with high-quality photos, but if your goal is to become a professional photographer, you will need a DSLR (Digital Single Lens Reflex) to take great pictures.
You can control every aspect of your photos with a DSLR including shutter speed (speed), aperture, ISO sensiblity, white balance and focus.
These features make it possible to create beautiful photographs with a variety of effects.
These controls can be used to change the mood of your photo.
For example, a fast shutter speed could blur your subject.
You can also make them appear more mobile by increasing the light that enters the camera.
A color temperature adjustment can be used to modify the mood in your image.
If there is too much blue light, you can adjust the red content to make it feel warmer.
To begin with, you may find it difficult to know which direction to point your camera.
However, once you understand the basics, you will soon realize that it is not so hard after all.
It's actually much easier than it seems!
When you first start out, you will probably only shoot landscapes or close-up shots of objects.
But don't worry; as you gain experience, you will be able to capture anything from portraits to abstracts.
Once you have mastered the basics, you can move on to more advanced subjects.
Here are some tips that will help you get going.
-
Choose a good location. Places that allow you to relax and have fun are best.
-
Find something to photograph. Try to find unusual or unique objects.
-
Make sure to take lots of practice photos. Practice makes perfect!
-
Experiment with different angles. Depending on the goal, hold your camera in a different way.
-
Use different lenses. Different lenses offer different perspectives.
-
Shoot in low-light conditions. It can be difficult for you to photograph in bright sunlight.
-
Practice framing your shot. Framing is one of the most important skills when capturing an image.
-
Learn how to set up your camera settings. It is a great way to improve your photography skills by experimenting with the settings of your camera.
-
Continue to learn new techniques. Photography can be learned in many different ways. You can visit local museums, galleries and libraries.
-
Read magazines and books. The best way to learn about photography is to read books.
-
Join a club. Photograph clubs often host events that encourage members sharing their work.